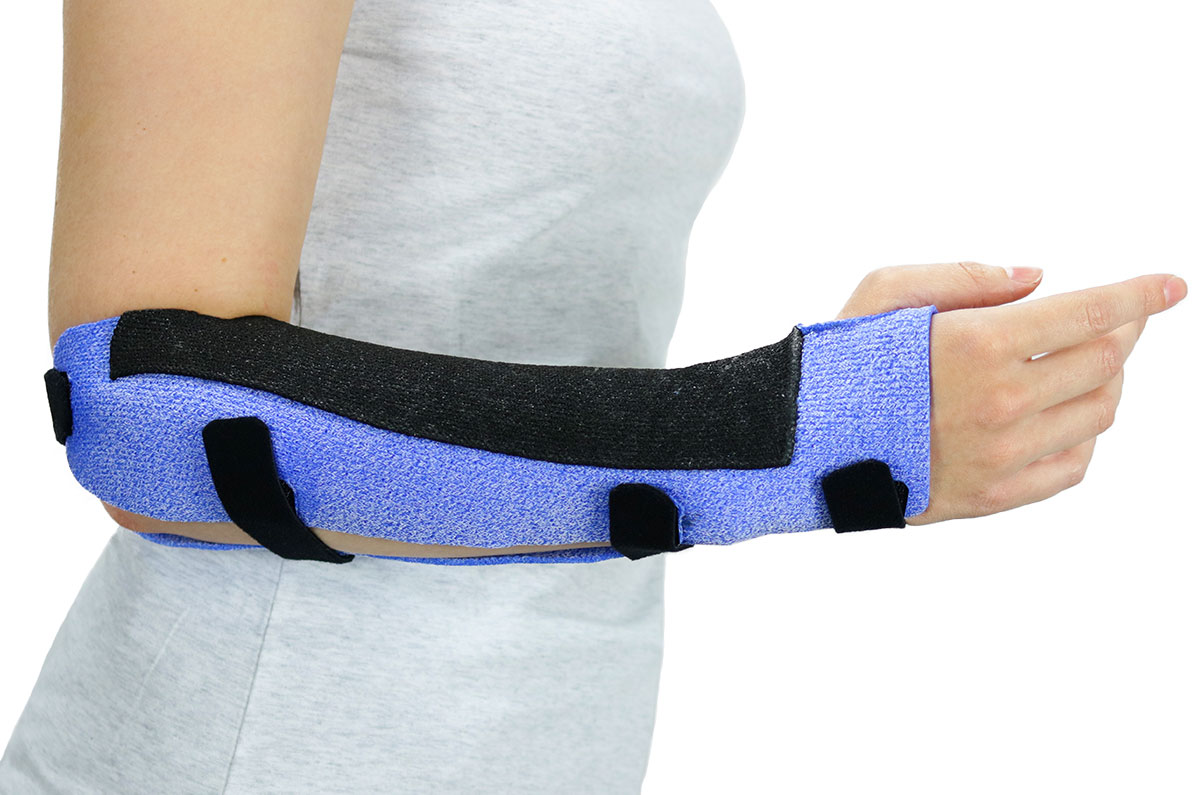
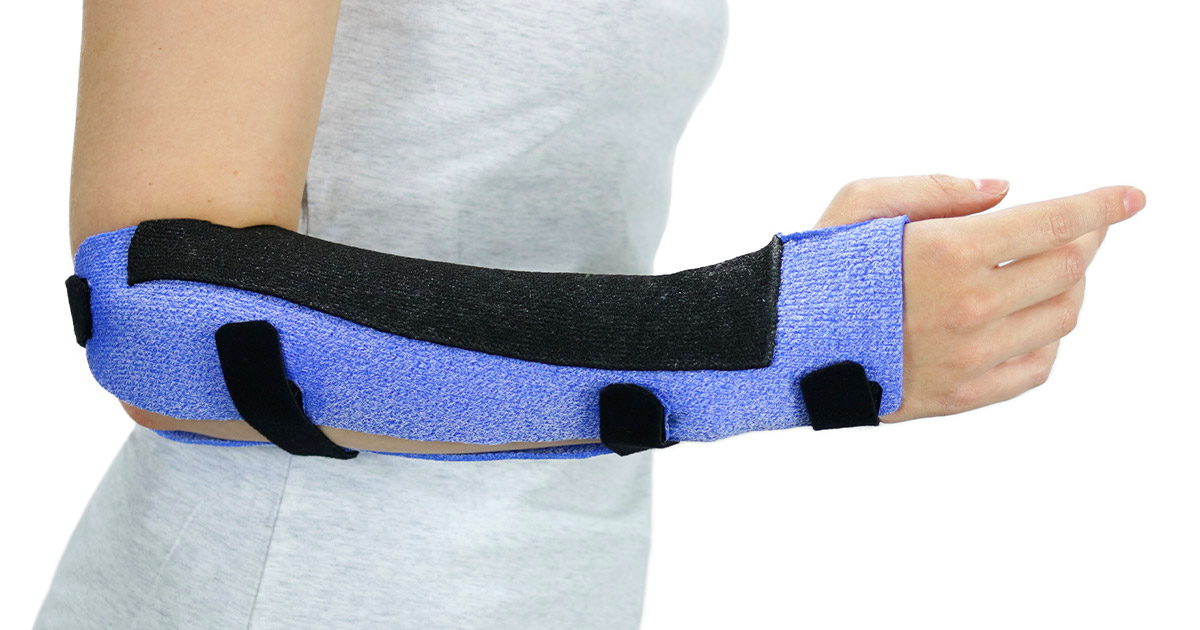
The Muenster is a useful orthosis for preventing full forearm pronation and supination. It helps to position the forearm in a neutral position so that injured structures can heal.
We go into further detail about this design and explain how to fabricate the orthosis from Orficast More. The new 30 cm version now allows you to fabricate even larger, arm-based orthoses in the unique knitted thermoplastic.
Go straight to the fabrication tutorial.
Pathology
The Muenster orthosis helps to prevent full active forearm rotation. This way, injured tissues and structures can heal without overstretching or shortening of tissue length. This may be particularly important for certain elbow pathologies or after trauma/surgery of the Radius, Ulna, Distal Radial-Ulnar joint (DRUJ), Proximal radial-ulnar joint, and TFCC structures.
The Muenster is typically used to immobilize the forearm in the following pathologies:
- TFCC tears
- Galeazzi fracture dislocations
- DRUJ fractures and dislocations
- Ulnar abutment injuries
It allows for limited active flexion and extension of the elbow, but prevents full forearm rotation, and provides stabilization of the radial-ulnar joint and immobilization of the DRUJ.
Read our dedicated blog post about the Muenster and Sugar Tong Orthosis for more information.
Product recommendations
An elastic-based, coated material is highly recommended for the Muenster Orthosis. The following materials all work very well for this design:
Thanks to the non-stick coating of the above thermoplastics, you can pinch the material together at the posterior elbow and on the ulnar border. Both hands are free to position the wrist in slight extension and the forearm in a neutral position.
Specific advantages of Orficast More 30 cm are the easy pattern making and application of an otherwise more challenging fabrication. The fabric-like material provides comfort and makes for a relatively light-weight orthosis.
.
Fabrication steps
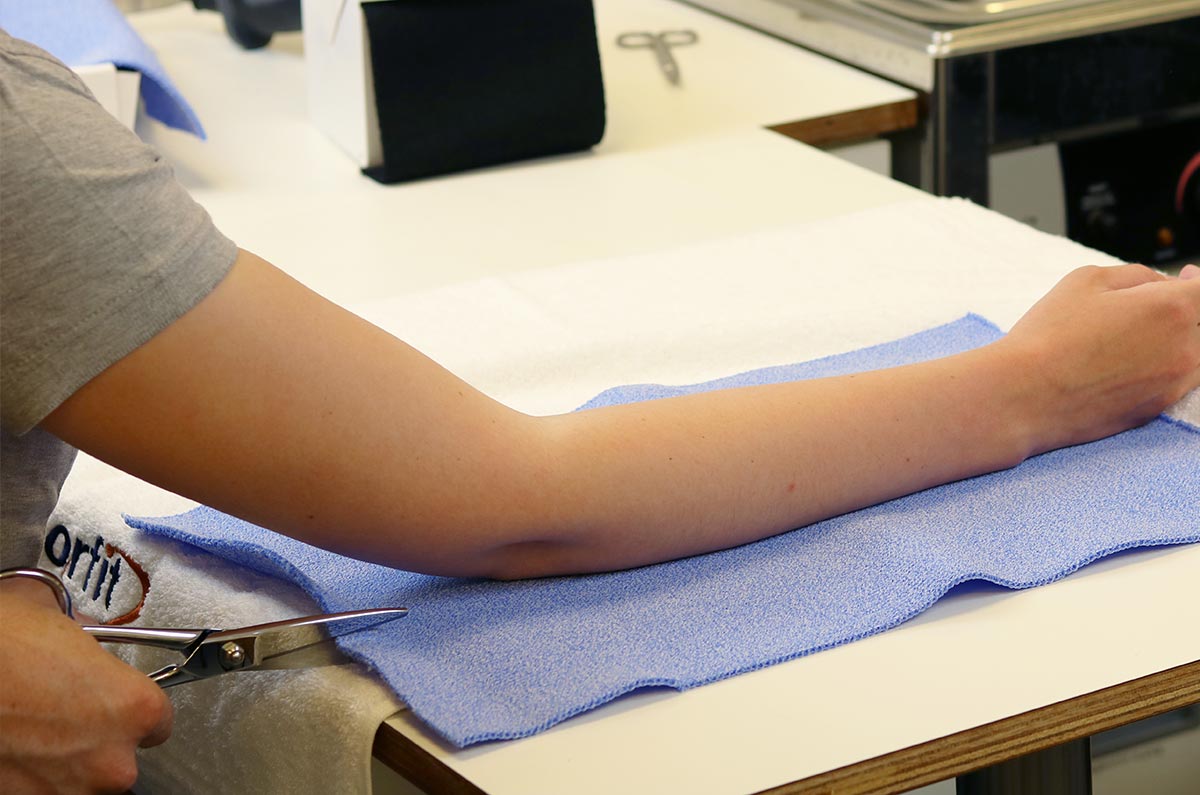
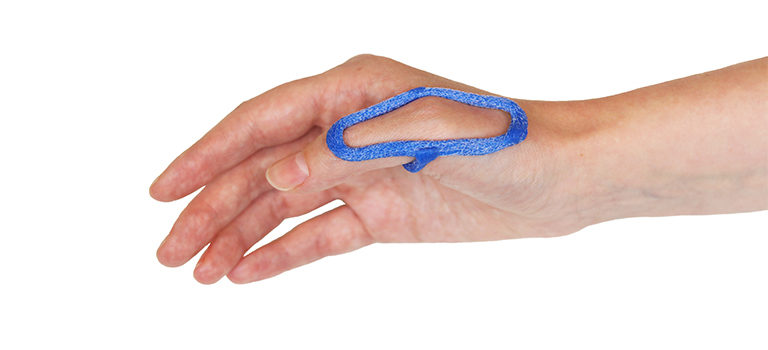
1. Cut Orficast More 30 cm in the desired length
- Place the distal palmar flexion crease on the edge of the material to determine the length of the orthosis.
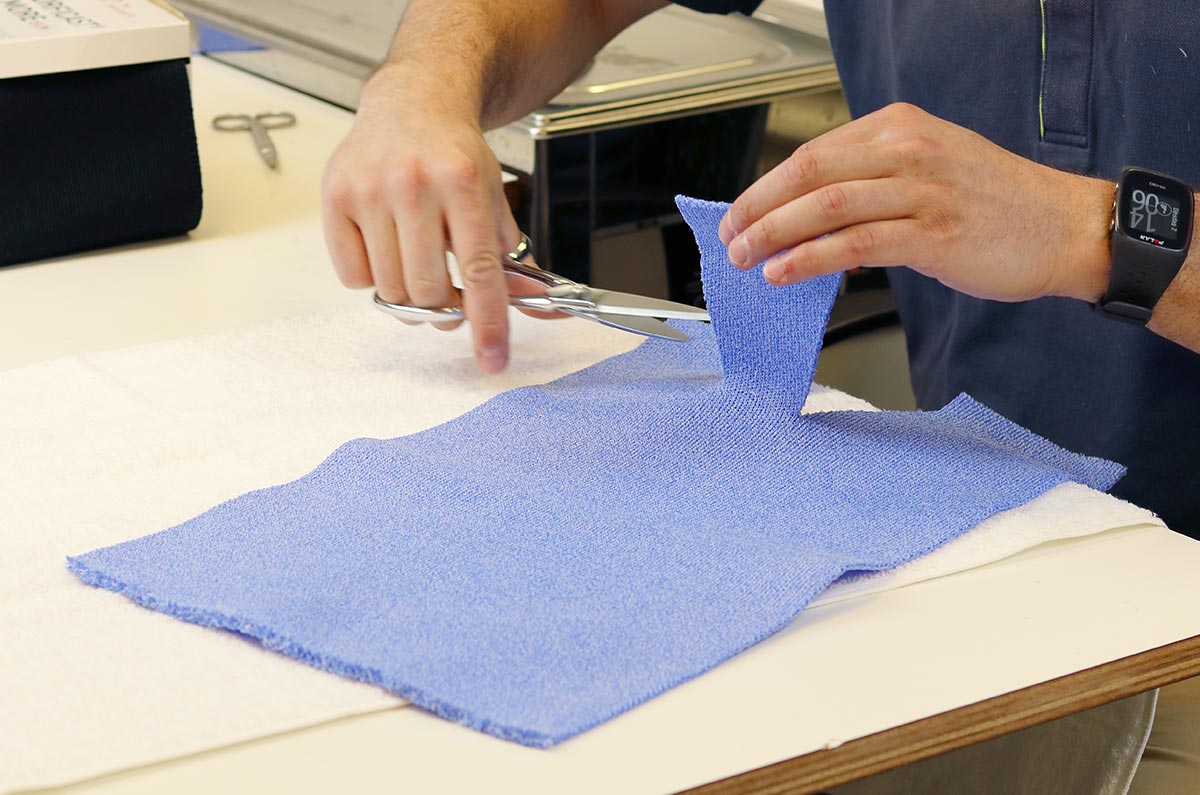
- Using scissors cut a small slit at the height of the thumb’s MCP as an opening for the patient’s thumb.
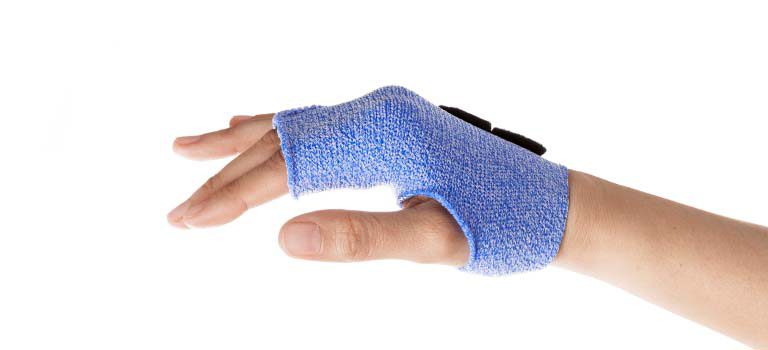
- Mark with scissors or a marker where the elbow will sit in the orthosis.
- Cut out the space for the elbow. The two flaps will be wrapped around the elbow during moulding.
.
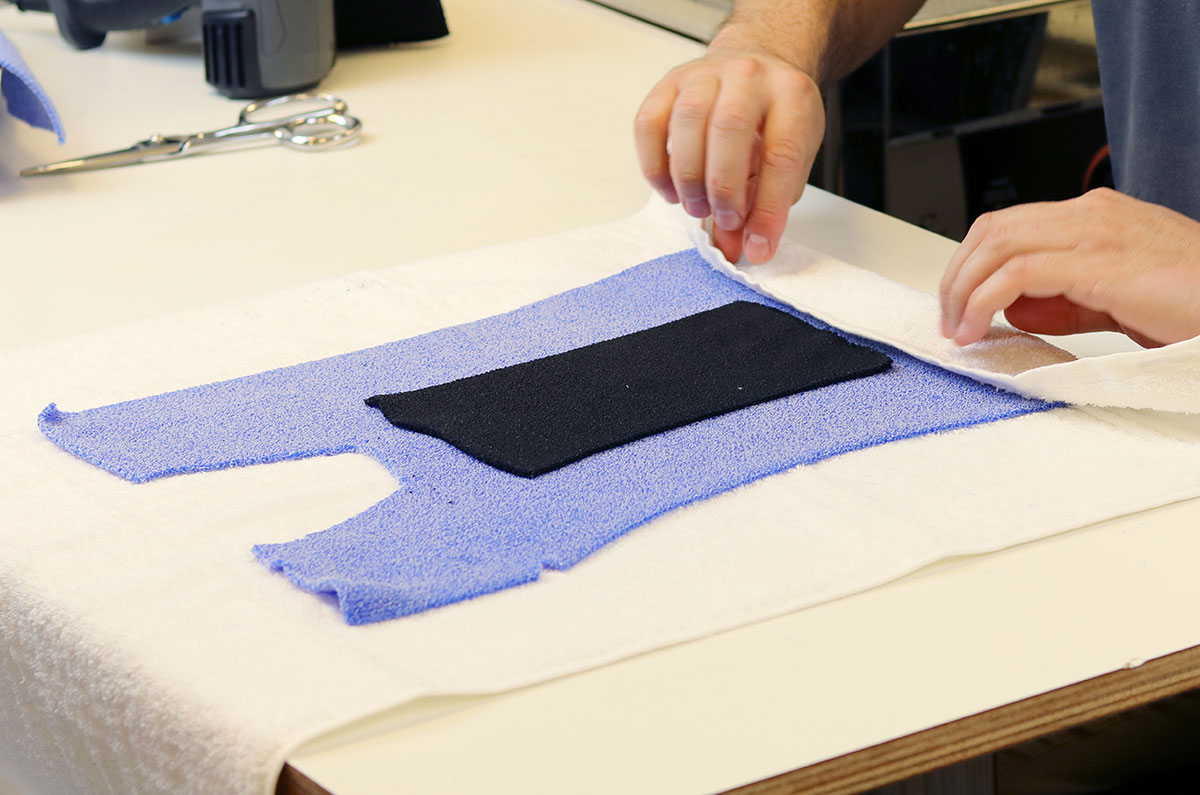
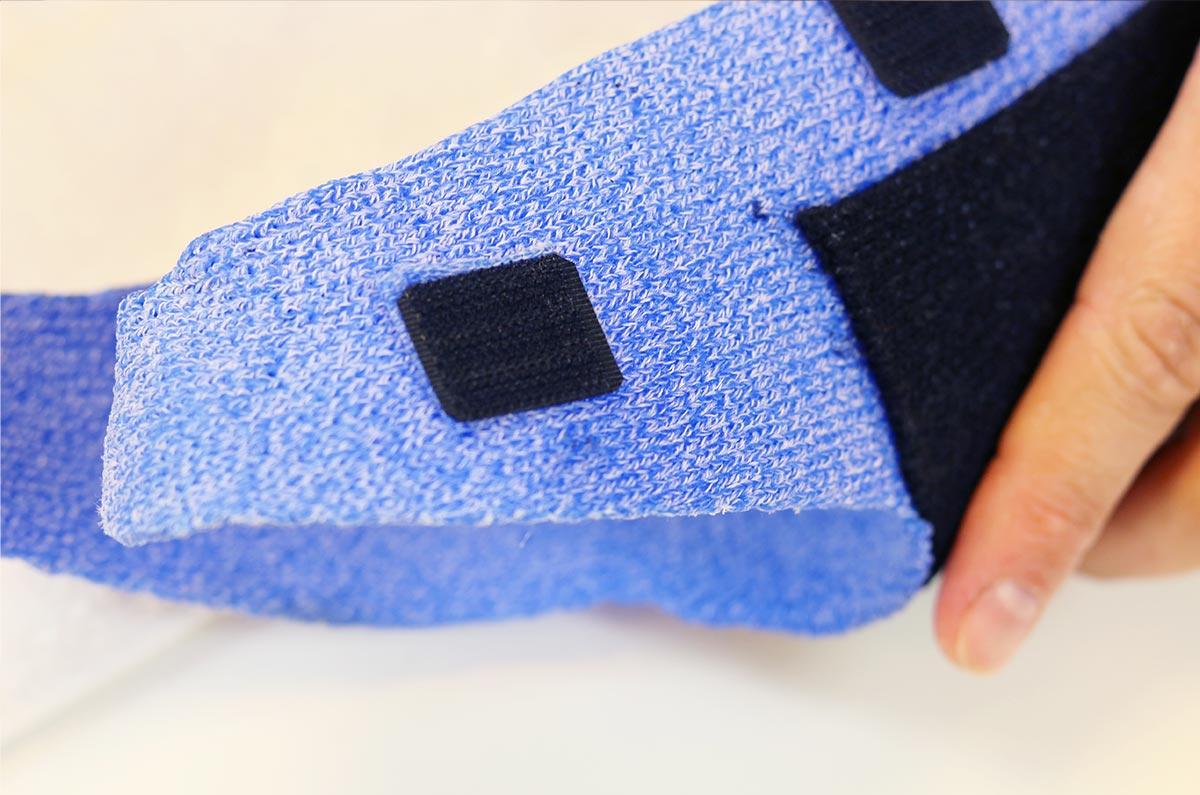
2. Add a reinforcement layer (recommended)
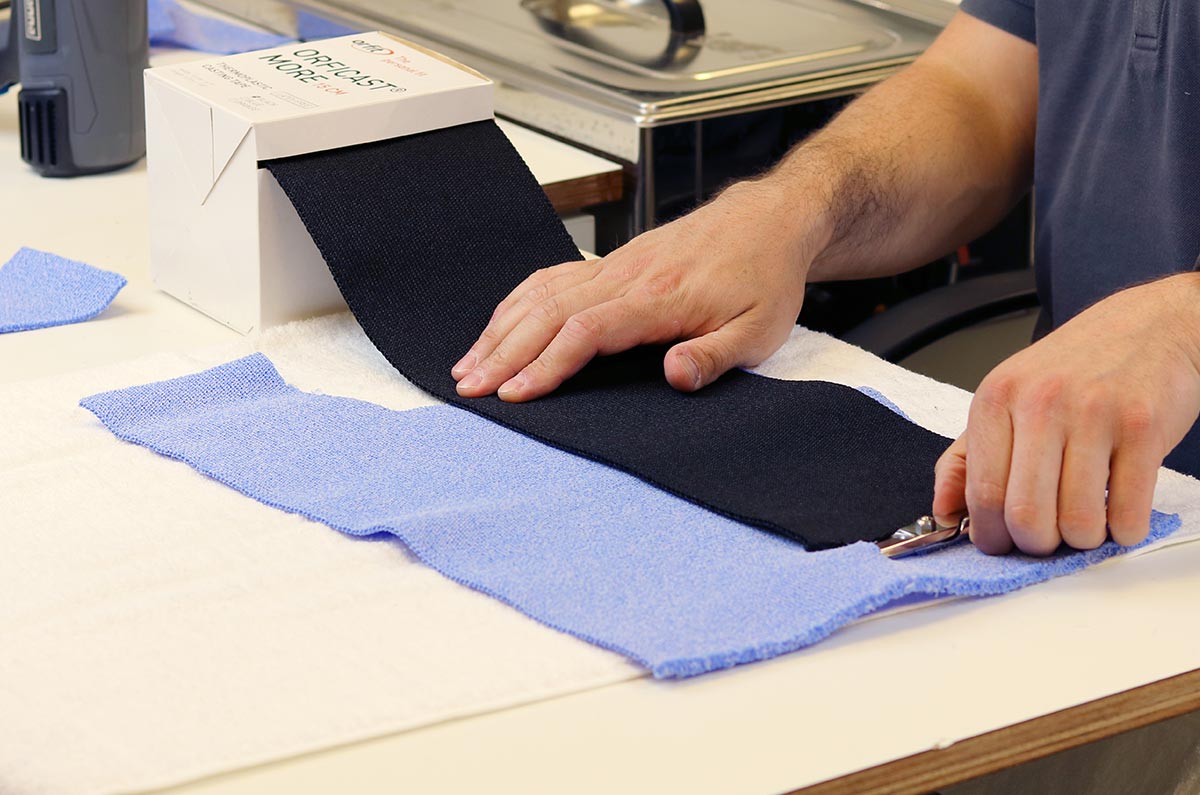
If necessary, you can add an extra reinforcement strip of Orficast More 12 cm. Apply it on the dorsal aspect of the orthosis to ensure proper immobilisation.
- Heat both Orficast layers simultaneously in a water bath at 65°C (149°F) for about 2½ minutes.
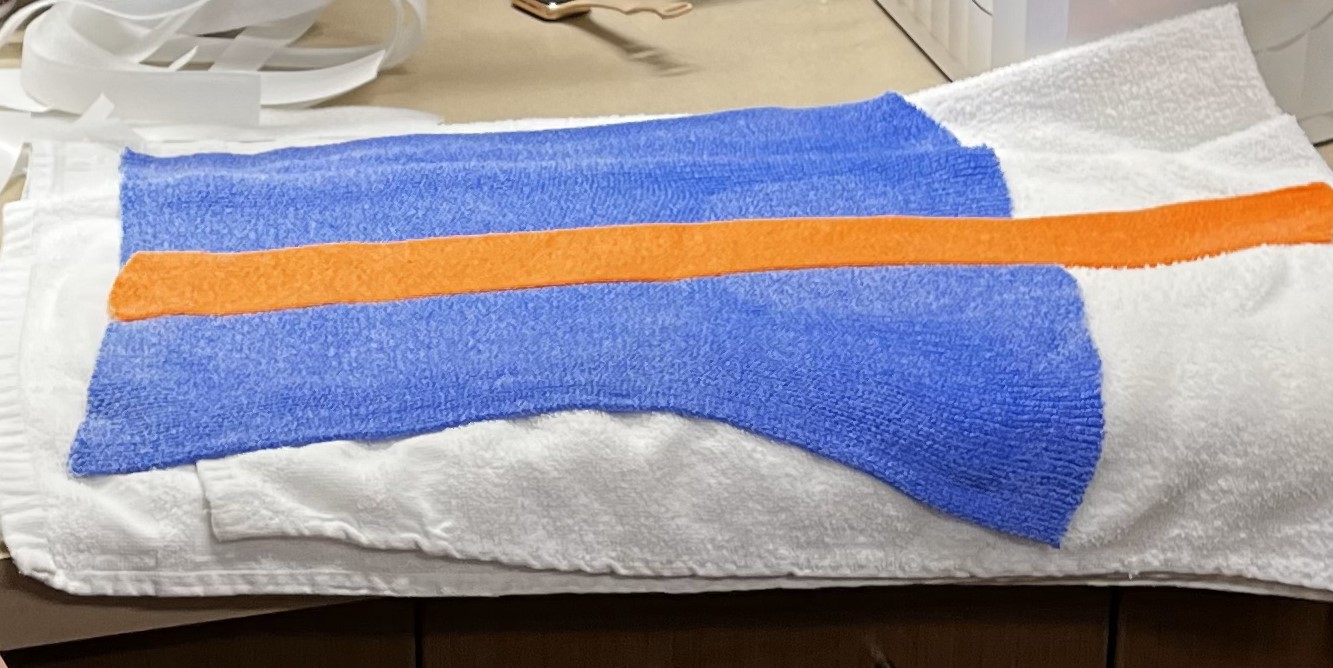
- Take the Orficast More 30 cm out of the water bath and place it on a towel.
- Position the Orficast More 12 cm strip proximal from the thumb slit and in the centre of the Orficast More 30 cm.
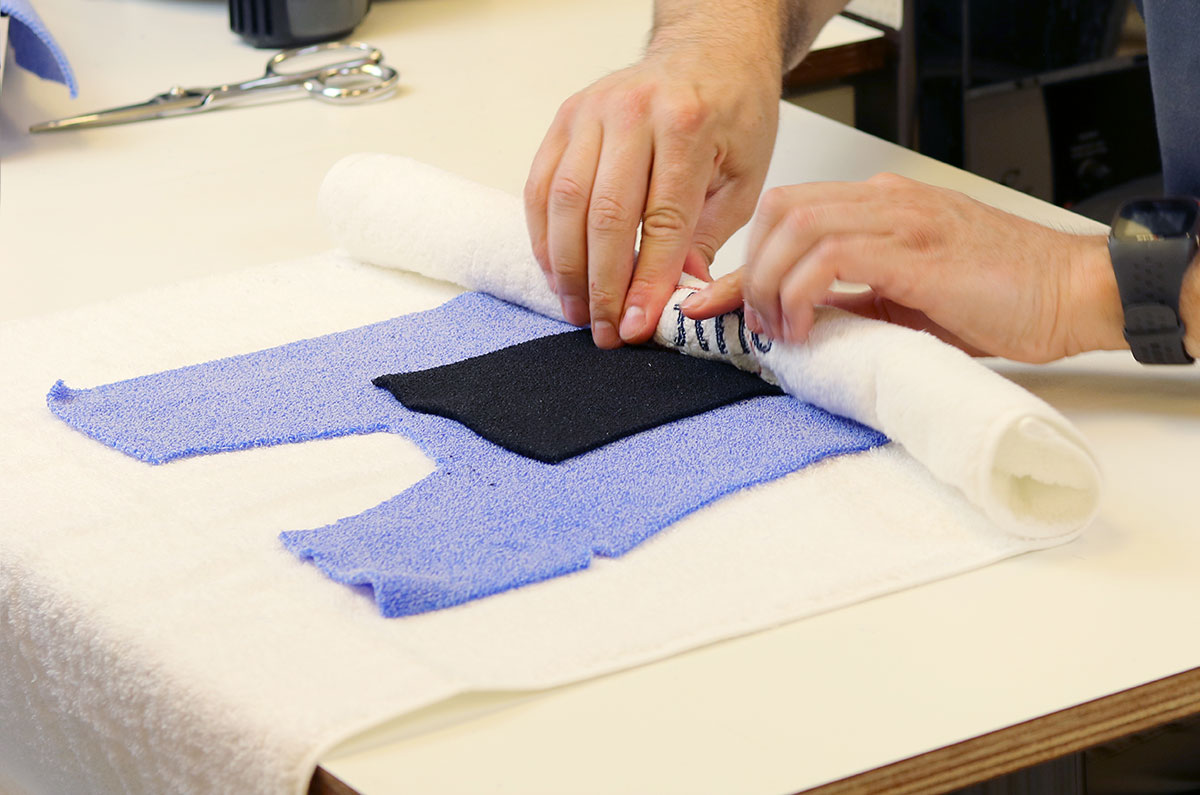
- Roll the towel to evacuate all excess water and to permanently bond both layers.
- If necessary reheat before final application.
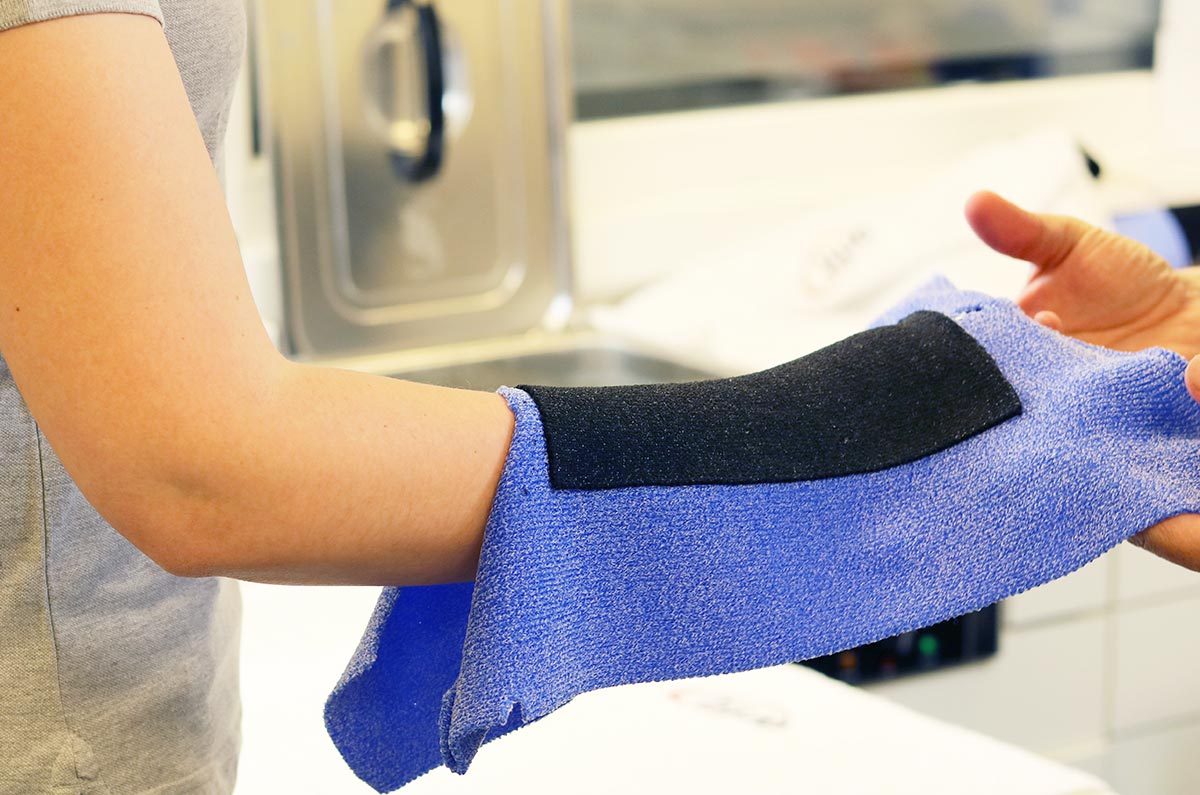
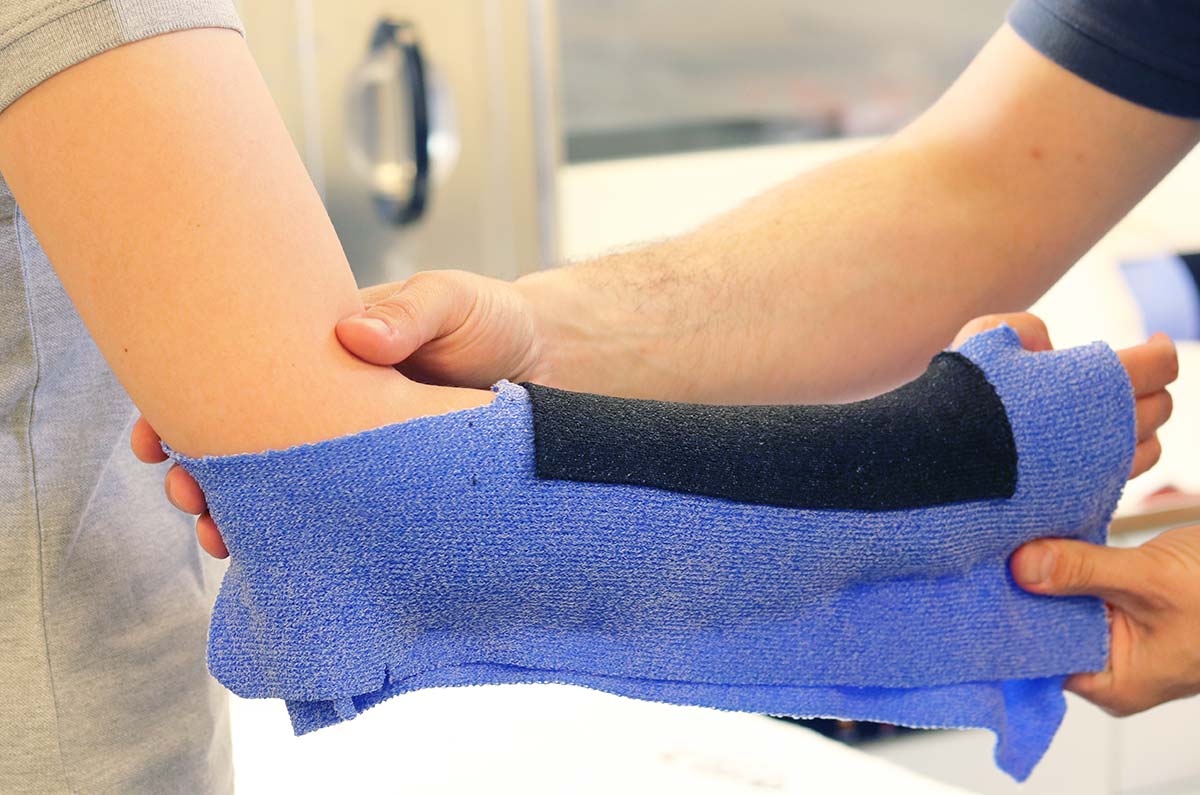
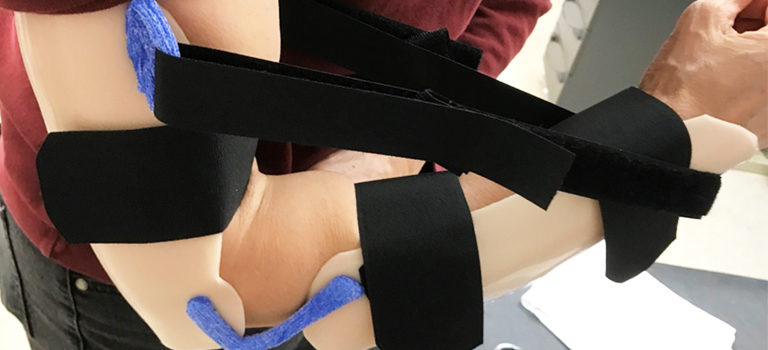
3. Mould the orthosis on the patient’s arm
The patient should be standing with the elbow flexed to 90° and the forearm placed in a neutral position. You will need full access to the posterior elbow, epicondyles and wrist for the best fabrication technique.
- Slip the thumb through the thumb hole and mould the material around the arm.
- Lightly pinch the Orficast along the ulnar border and at the posterior elbow. Don’t pinch too much material for this seam as it will need to be opened quickly, to prevent permanent bonding. Make sure that the material conforms neatly.
4. Finish the orthosis
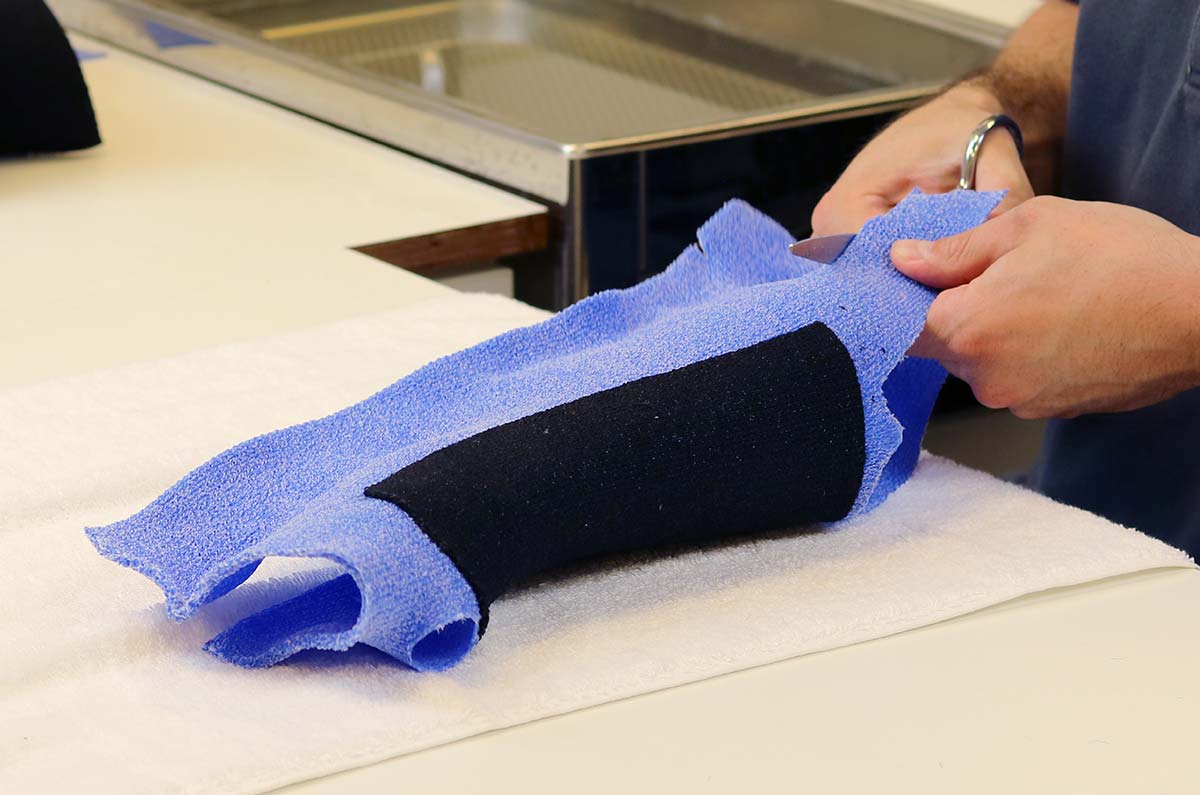
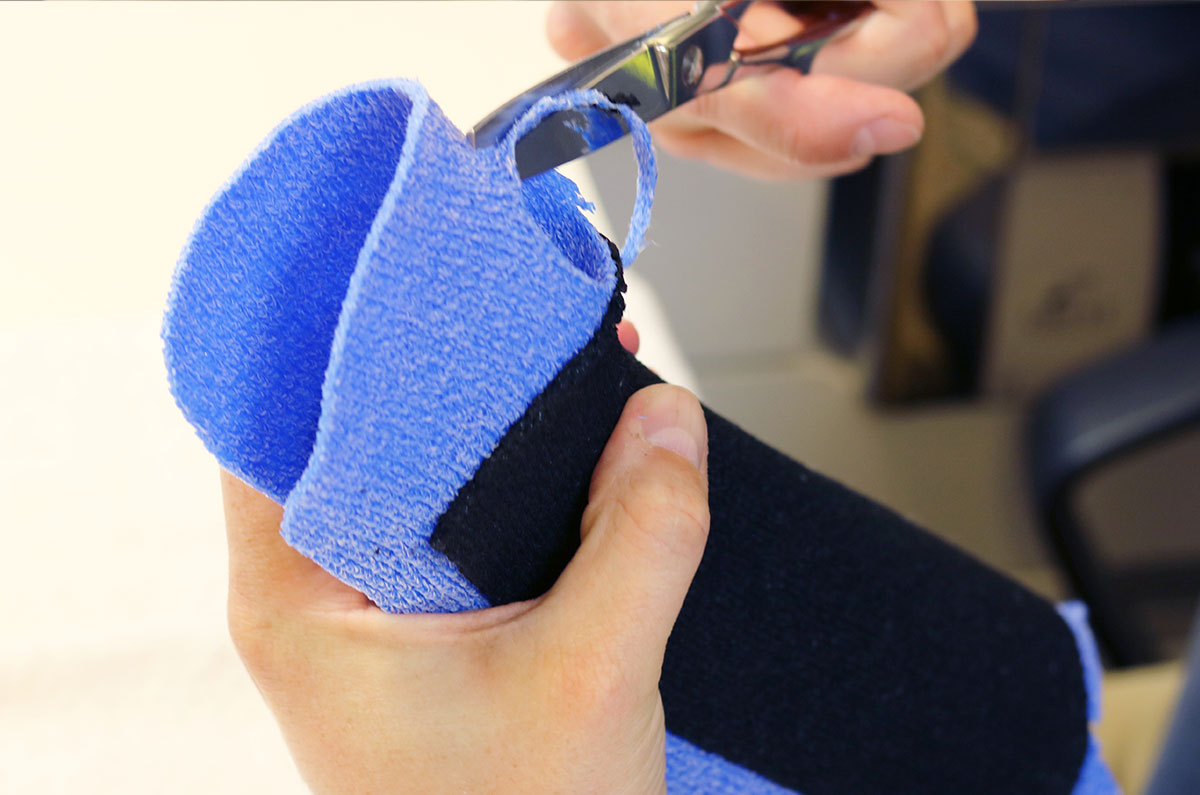
- Remove the orthosis from the patient by carefully opening the seam. Slip the orthosis off from the patient’s arm.
- Trim all excess material and round any sharp edges. Make sure that the distal palmar flexion crease remains free.
Wearing schedule
This orthosis should be worn full time immediately after surgery of the involved structures. The patient could be instructed in gentle elbow range of motion exercises.


Written by Björn Le Roy, Occupational Therapist, BA
Björn was trained in orthotic fabrication by French Occupational Therapist, Jean Christophe Arias. In 2016, he began his Bachelor’s in Occupational Therapy which he successfully concluded in 2019.
Over the years, he has become an avid teacher of orthotic fabrication, giving numerous educational workshops across the world.
If you’d like to receive the latest product updates and interesting Orfit news, subscribe to our newsletter: