personal fit
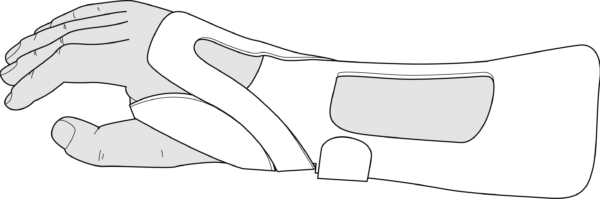
Distal radial nerve splint
Distal radial nerve palsy.

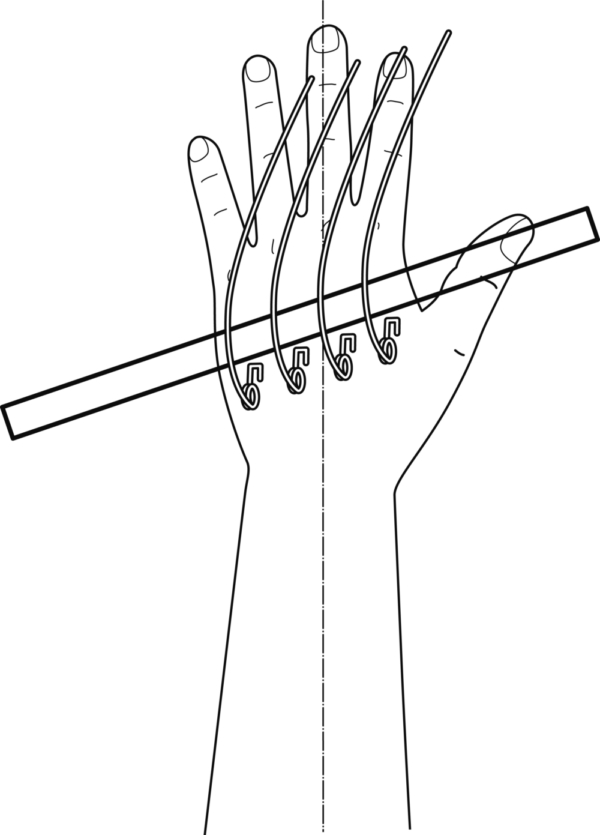
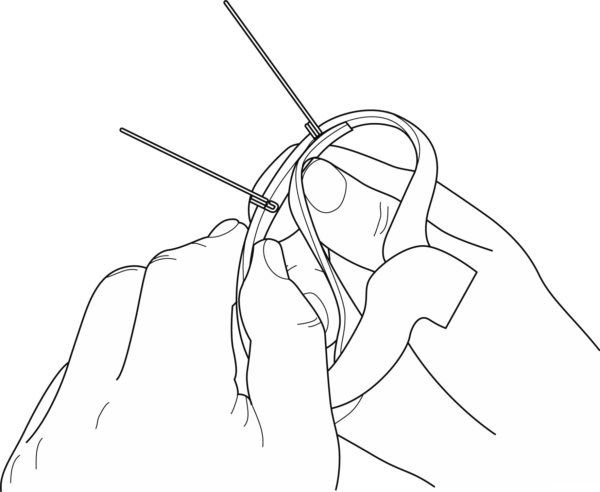
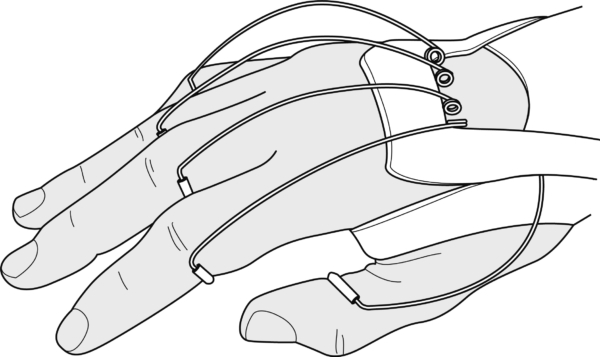
Mould a metacarpal ring where the palmar section rests proximally on the carpals and dorsally crosses the middle of the back of the hand.
Mark the place where the various extension springs are to lie, which is directly opposite the web spaces.
Heat the U-shaped spring arm and stick it at the bottom into the plastic. Attach al springs in this manner.
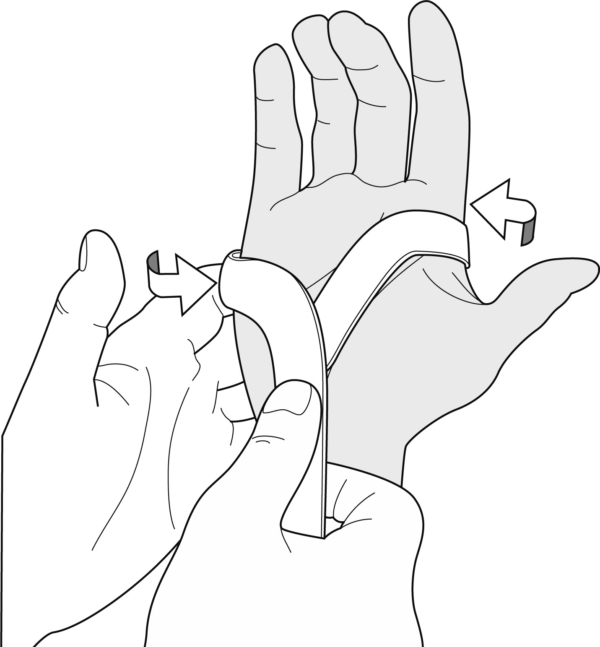
Briefly heat the underside of the metacarpal ring and cover with a thin layer of Orfit Classic. Leave to harden completely.
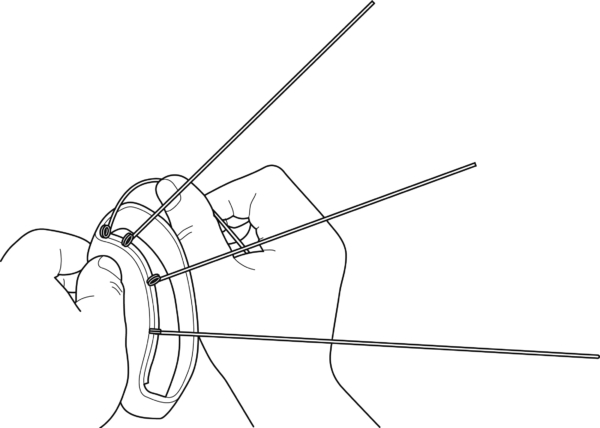
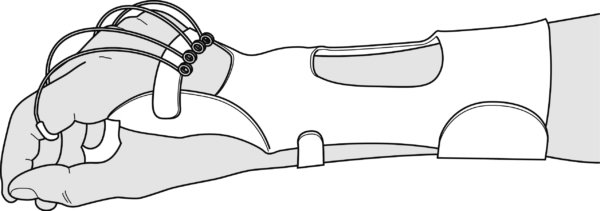
Bend the long spring arms into a bow.
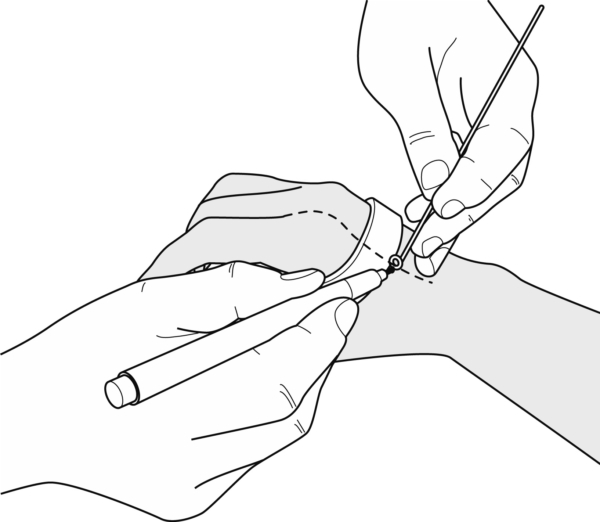
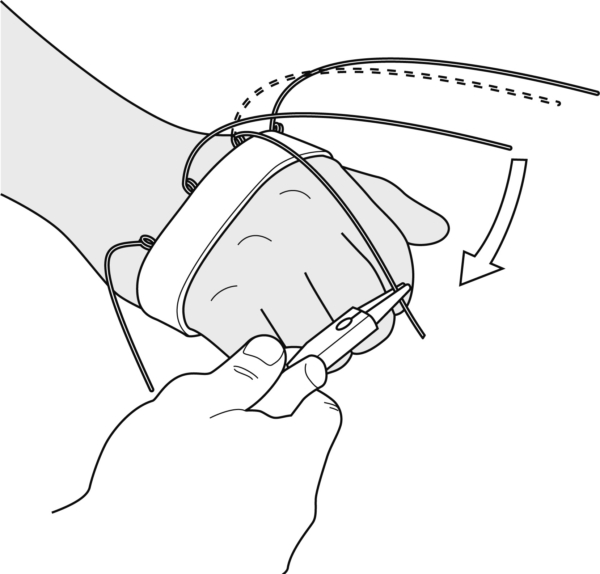
Have the patient make a fist, push the spring in between the knuckles and mark the length of the proximal phalanx.
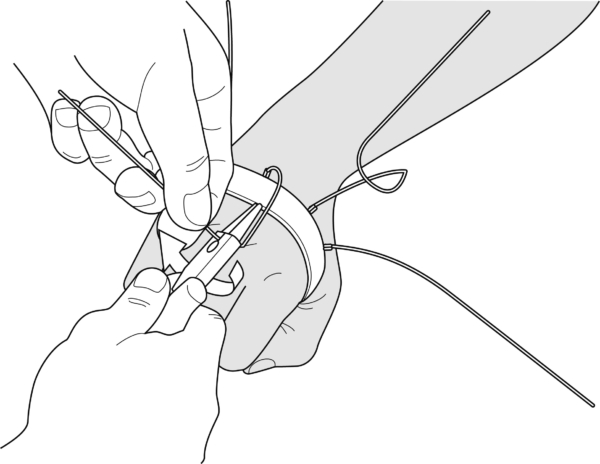
Bend the wire at that point downwards in a 90° angle.
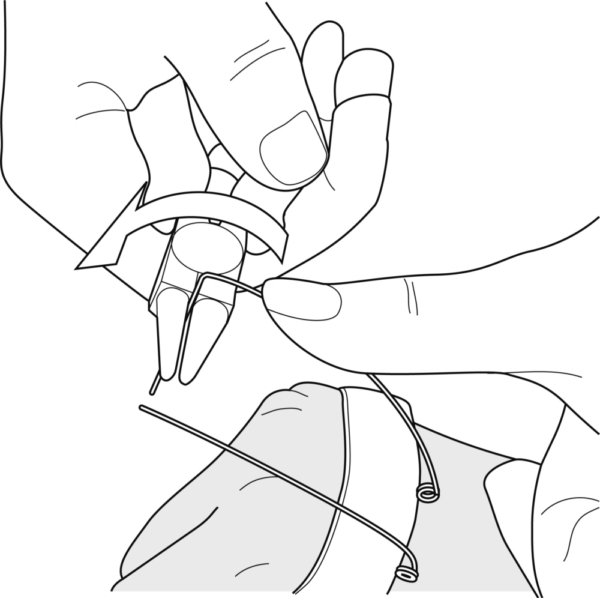
Shape the wire into a half ring ulnarly.

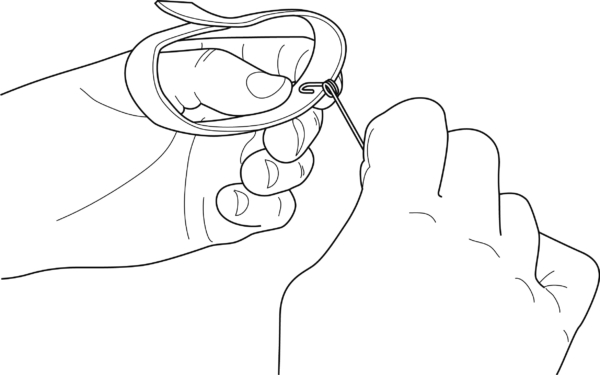
Finishing: Strip an electricity wire 1.2 mm thick and use the insulation to cover the finger rings. If necessary, secure with a drop of cement.
Alternatives: the MCP extension splint can also be part of a wrist extension splint, whether fixed (see A) or removable (see B).
A. fixed to a wrist extension splint
Stick a 3.2 mm strip of unperforated Orfit Classic over both lateral wings of the splint base.
Continue as from step 2 above.
B. removable from a wrist extension splint
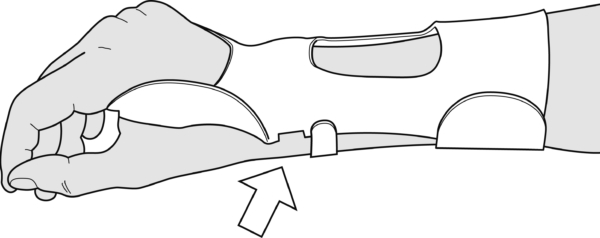
Make two incisions in the splint base, just behind the folded wings.
Mould a U-shaped Orfit Classic pattern over the dorsal aspect of the hand, both legs resting neatly along the wings of the splint base.
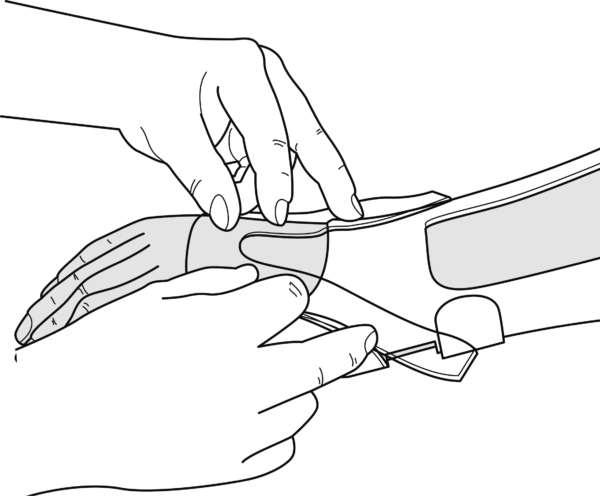
Trim the legs to length, stretch the ends and fold them into the cut-aways.
Flatten the resulting small hook completely so that no extra thickness can be felt.