Before molding any thermoplastic on your patient’s hand, we recommend you to begin with a pattern!
A good pattern allows you to judge the correct amount of material needed for the specific orthosis. And it helps you to envision the shape and position of the finished product.
So how do you make a pattern for an orthosis?
Drawing the patient’s hand
First, position the patient’s hand palmar side down on a paper towel. If the patient cannot place their involved hand on the paper towel, you can draw an outline of the non-involved hand or draw a pattern of your own hand. You can always go back and make adjustments directly on the paper towel prior to cutting out the thermoplastic material.

Place the hand in a neutral wrist position. Keep the fingers close together and the thumb in wide abduction.
Check the positioning of the hand on the paper towel:
- Make sure that your patient’s hand is placed in a neutral wrist position and not radially or ulnarly deviated. You can assess this by checking for straight alignment of the forearm bones with the third metacarpal.
- Place the fingers close together and the thumb in wide abduction.
- Draw an outline of the forearm, wrist, thumb and fingers with the pen or marker angled straight down on the paper.
Add additional width to the forearm lines on the radial/ulnar sides to make sure that the pattern has enough material to wrap around the forearm. Choose one of the following methods to do this:
- Redraw the forearm lines with the pen angled at a 45° angle to the arm.
- Add about 2,5 cm/1” width to the previously drawn forearm lines.
- Add 2-3 fingers’ width to the previously drawn forearm lines.
These measures ensure that the pattern (and subsequently the orthosis) has enough material to adequately cover 1/2 of the circumference of the forearm.
Anatomical landmarks: marking the pattern for your orthosis
Now it’s time to mark the relevant anatomical landmarks that will aid in determining the proximal and distal edges of the orthosis. As we are looking at the dorsal hand, we have to imagine where the volar landmarks are placed.
These are some of the most helpful anatomical landmarks to mark:
- At 2/3 the length of the forearm – mark both radial and ulnar sides.
- The MCP joints of the little finger and index finger – the MCP joints of the little finger and index finger help you to find the distal palmar crease, which is angled to the ulnar side.
- The first web space – often a thin wedge of thermoplastic material wraps around through this web space to anchor the orthosis.
- The narrowest part of the wrist – adjust the width of the pattern to accommodate to the narrow wrist or else you will have to do a lot of trimming.
- The thumb IP joint – thumb orthoses typically allow for unrestricted IP joint motion.
- The PIP joints of each finger – MCP joint blocking orthoses typically allow unrestricted PIP motion.
Adjustments to the pattern
After drawing the relevant anatomical landmarks, remove the patient’s hand, and draw your specific orthosis pattern lines. The pattern itself may come from a picture or from your own idea of which specific joints need to be included in the orthosis.
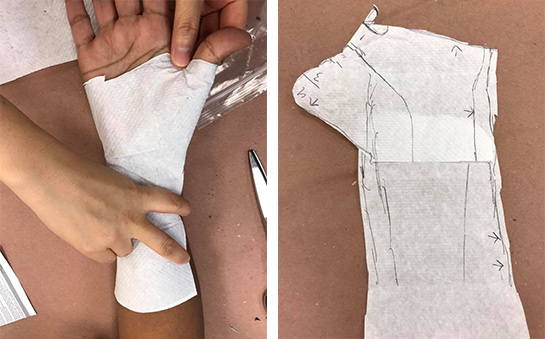
Check the fit of the pattern and draw any additional markings.
Cut out the pattern and check the fit on the patient’s hand in the desired position. Draw any additional markings on the pattern to indicate necessary adjustments. You can add arrows to increase length or width, or make lines indicating where the pattern needs to be trimmed or shortened.
Making adjustments to the pattern will save time and cost when cutting out the thermoplastic material.
Cutting out the pattern for the orthosis
Once you have checked the paper towel pattern for fit, place it on an appropriately sized piece of thermoplastic material. Draw an outline, but leave enough space for cutting away the marked lines. These should not appear on the finished orthosis. You can use this marker to draw the outline, it will easily wipe off later on.
Prior to cutting out the material, determine whether you should preheat it:
- 3 mm (1/8”) thick material is best cut when slightly warm.
- 2 mm (1/12”) thick material may need only slight heating for ease of cutting.
- 1,6 mm (1/16”) thick material is best cut without heating at all.
Check the fit of the cut-out thermoplastic.
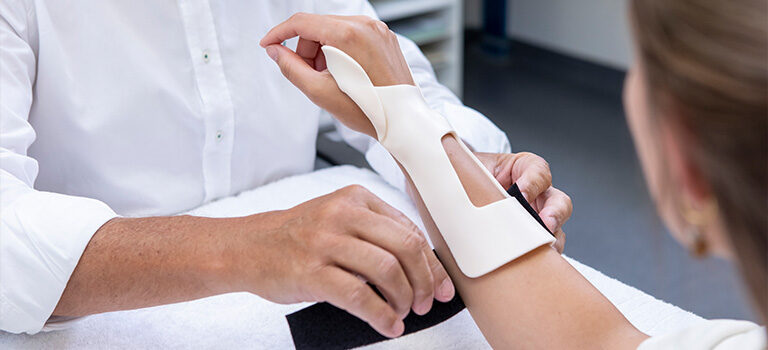
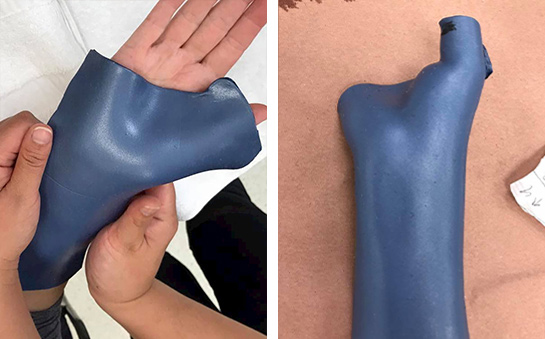
Activate the material and place the patient’s hand in the desired position. Mold the material to the patient’s hand just like you fitted the paper towel pattern earlier.
In conclusion
A well-drawn pattern will translate to an orthosis that requires only minimal trimming for a great fit.
We hope you’ll try out our tips next time you need to make an orthotic pattern. And we’d love to see the results! Share your patterns and orthoses in the Orfit Splinting Group.


Written by Debby Schwartz, OTD, OTR/L, CHT
Physical Rehabilitation Product and Educational Specialist at Orfit Industries America.
Debby is a certified hand therapist with over 36 years of clinical experience. She completed her Doctorate of Occupational Therapy at Rocky Mountain University of Health Professions in 2010. She has worked at Orfit Industries America as Product and Educational Specialist since 2007.
Debby is also an adjunct professor at the Occupational Therapy Department of Touro College in NYC and has written many book chapters in the field of hand therapy and multiple articles for hand therapy journals, including the ASHT Times and the Journal of Hand Therapy. She has published a new textbook on orthotic fabrication together with Dr. Katherine Schofield, entitled “Orthotic Design and Fabrication for the Upper Extremity: A Practical Guide”.
Debby’s Google Scholar
Contact us for more product information or find your local distributor here.

If you’d like to receive the latest product updates and interesting Orfit news, subscribe to our newsletter: